If your Mac frequently performs slowly or freezing all the time, you see a “Your system has run out of application memory” message or occasionally seeing the dreadful spinning beach ball, chances of these can be signs that your memory, or RAM, is being used to the max.
What is RAM on Mac?
Random Access Memory (RAM) is a computer’s temporary data storage device. It stores the information the computer is actively using so that it can be accessed quickly. The more running programs your computer has, the more it uses memory to perform properly. It’s essential for your computer to work properly.
It is different from the internal storage on your Mac. You keep all your files in internal storage but you can’t choose what to save in your RAM as your computer needs flexibility in moving files in or out of that memory all the time.
It works similarly like when you are working in an office. The bigger the office the more people can do different tasks simultaneously. Like in a computer, the more RAM you have the more process your computer can handle at once.
When you launch a program, your computer gathers the program’s files from the hard drive. Once the files are retrieved, the computer needs a working area to process the data and allow you to interact with it. This is your RAM. Your computer places your program’s files in RAM temporarily while you are working with them so that your computer can access that information faster and efficiently.
Why it is necessary to Add more RAM
By default, most Macs were shipped with around 8GB of RAM. Old files and cluttered caches can reduce your Mac’s available RAM and cause your system to slow down. Some applications require a lot of RAM to work efficiently, such as video editing apps and 3D design software.
Adding more RAM is one of the easiest, most cost-effective ways to improve the performance of your MAC, primarily because most computers are shipped with a minimal amount of memory.
Free up Memory with System Activity Monitor
If installing more RAM isn’t an option, you can start looking at the Activity Monitor to show how much memory is being used – that will help you identify if an app is using up more than it should be.
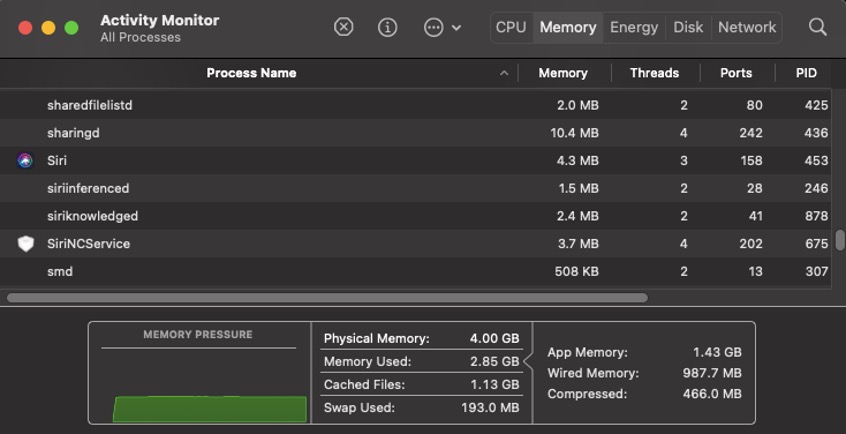
Activity Monitor comes with your Mac. You can find it in Utilities, or start typing Activity Monitor into Spotlight. If you select the Memory tab, this shows a list of all the active apps and processes on your Mac and how much memory each of them is using.

You should see a Memory Pressure chart and the breakdown of how your memory is being used.
The most important thing to look at is the Memory Pressure chart, which shows up in green, yellow, or red based on whether your Mac needs more RAM or not. If it is all green, it means your RAM is still efficient. Yellow means your Mac might be needing an upgrade, and red means your Mac definitely needs that added RAM.
When you find the suspect app to be using resources even though you weren’t using them, select it and click on Information (i).

This will show more information about the process including the memory it used. If you want to close this app, you can just click on Quit. Then it will ask if you are sure to quit this process. You can choose Quit or Force Quit. Force Quite is useful for frozen apps.
Note: If you are not familiar with the process, it’s better not to close as it may be required by your Mac.
Reduce Memory Usage on Mac
We now know the fix we can do when our Mac is running out of memory. It is still better if we can prevent it from happening especially if we only have limited options to upgrade our Mac’s memory.
There are a few things you can do to maximize what is available. This may also help speed up your Mac.
1. Make your Desktop Clean all the time.
Cluttered documents, images, and different types of files are worth cleaning or at least sorting them to a different folder/location. The macOS is designed to manage your Desktop icon as an active window. The more icons the more memory will be used.
2. Manage Memory Usage in Finder
The Finder application is designed by default to show all files available on the system. Try changing the default display of Finder to not show All My Files.
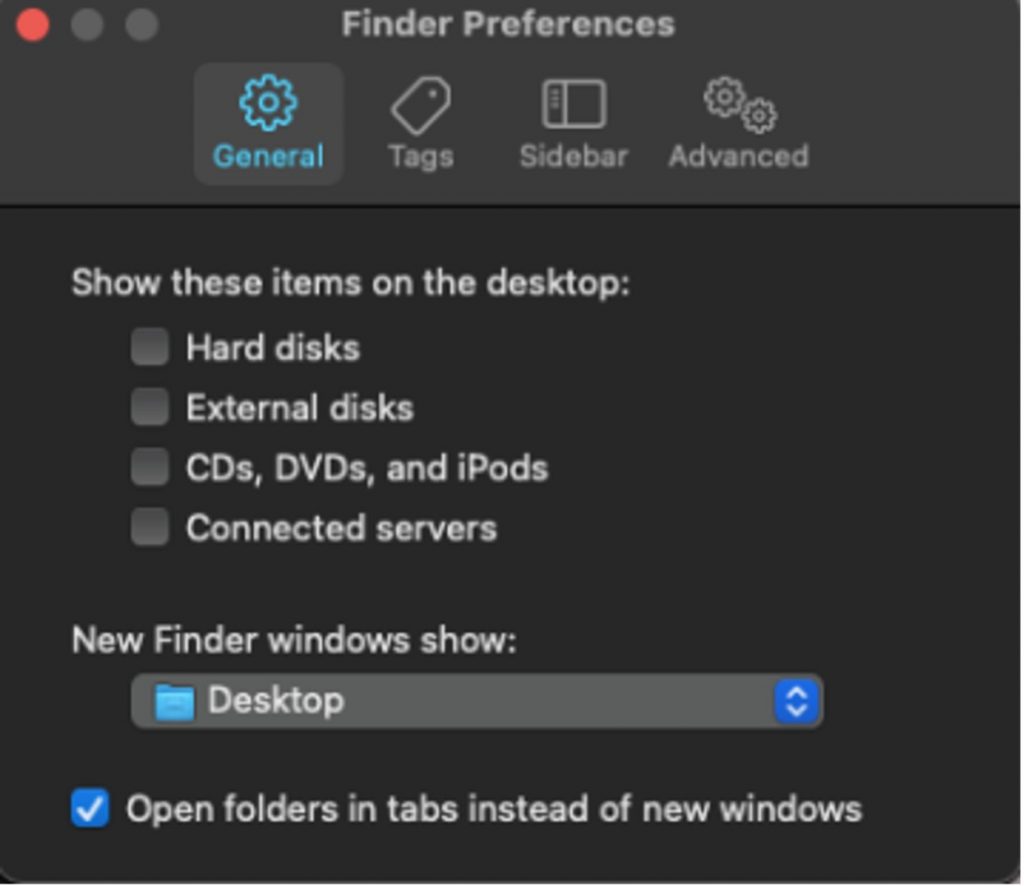
- Open Finder and click on Finder > Preferences
- Under General choose a folder to be shown when you open a new Finder window.

3. Close Unwanted Finder Windows or merge them.
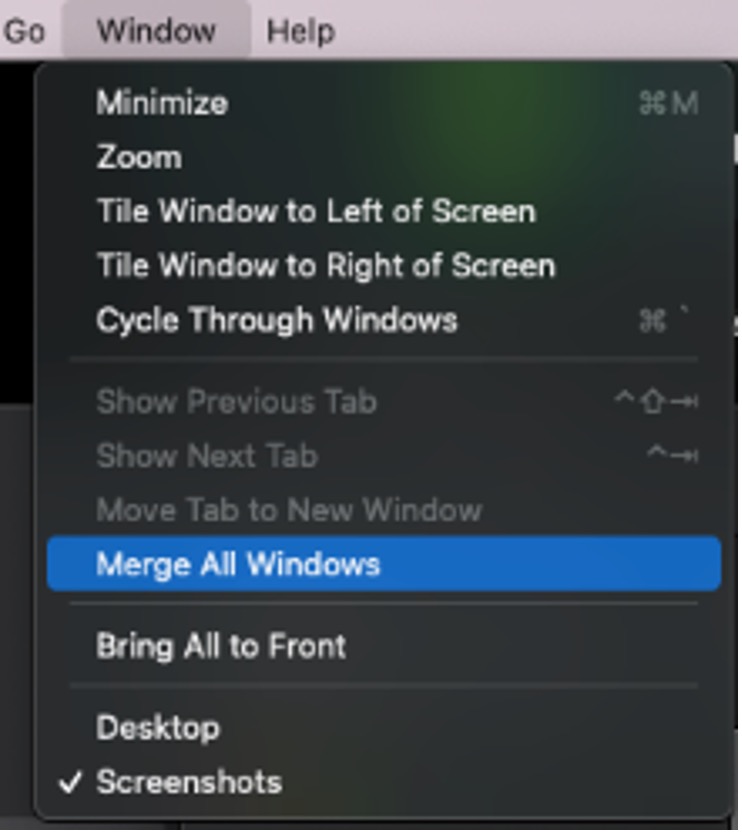
Each Finder window can have an impact on RAM usage. You can close them all at once by using the keyboard shortcut, pressing Command + Option + W, or merging all the Finder windows together.
In the Finder, click on Window > Merge All Windows.

4. Disable Items that launches at Start up
Check if there are apps set to run during start-up or after you log in on your Mac as most of these might not be really essential for your everyday use of your computer.
How to stop apps from starting automatically:
- Open System Preferences > Click on Users & Groups.
- Click on your User name on the sidebar on the left if that’s not already selected.
- Click on Login Items.
- Select an app in the list that you don’t want to run during startup and click on the (-) button.
5. Close web browser tabs
It’s best practice to keep minimal open browser tabs at the same time as recent macOS will see the websites open in Safari listed as a separate process in Activity Monitor. It would also be best to close Safari or the browser you use from time to time.
6. Delete browser extensions
Browser extensions are tools for quick access to features while surfing the internet. But sometimes they just consume more memory. Check your browsers for unwanted browser extensions you don’t really need.
7. Free up more disk space on your Mac
You may also need to clear some space on your Mac from time to time. The recommendation is to keep 20% of your drive space free. You could delete large unused files, old downloads, and old apps. Large unused files can be installer packages you used a long time ago that you already forgot. You can also look for duplicate files or similar photos.
Best App to Free up RAM and Optimize memory usage on Mac
Cleaner One Pro is an all-in-one disk cleaning app with an easy-to-use interface so you can effortlessly visualize, manage and free up your storage space to keep your Mac optimized for the best performance.
Its key features include:
- Quick Optimizer – Quick Optimizer monitors your CPU Usage, Network Usage and Memory Usage, while scanning and deleting Junk Files in just one click.
- Junk Files – Remove temporary files and hidden hidden leftover files in one click.
- Similar Photos – Offer an abundance of useful features to get rid of similar looking images.
- Big Files – Filter and manage large files on your disk and free up more storage space.
- Disk Map – Analyze your storage usage in a visual and interactive map.
- Duplicate Files – Retrieve and delete duplicate files.
- App Manager – View and manage apps by name, size or date. Remove unwanted apps and associated files. Batch remove multiple apps.
- Startup Manager – Easily manage startup apps and services. Speed up boot time and enhance the performance.
Cleaner One Pro is available from Apple’s App Store and the Trend Micro website. Download and claim your free trial today!
You may check our article about Cleaner one Pro for more information:
0 Comments
Other Topics
