
The DNS is effectively the phonebook of the internet. It is the technology that makes it so we don’t need to remember the IP addresses for the sites we want to visit — which certainly wouldn’t be an easy task (www.google.com’s IP address is 172.217.12.100, for example).
Although it’s no doubt convenient, the DNS is not without its privacy concerns. For example, if you are out and about and connected to a public Wi-Fi network, somebody with the right know-how could intercept your search queries (DNS lookups) and know what you’re searching for and the sites you’re visiting.
The thought of someone being able to compromise your privacy by snooping on your DNS lookups is a chilling one, but by turning on private DNS mode, you take away their ability to do that. Keep on reading to learn how to set up private DNS mode on Android, iOS, Windows, and macOS.
What is private DNS mode?
Private DNS mode allows you to send your network data to a secure DNS address rather than the one that would otherwise most likely be controlled by your internet service provider, or if you’re connected to a public Wi-Fi network, the internet service provider of that network.
Below you will find instructions on how to configure private DNS mode. Although it isn’t too difficult, it is recommended to make a note of any settings before you change them so, if you were to run into any issues, you can revert to the previous settings.
How to set up private DNS mode
See below for a step-by-step guide for setting up private DNS mode on your Android, iOS, Windows, or macOS device. Please note that depending on which software version you have, the instructions may differ slightly.
Additionally, you will need the address of a DNS provider. There are many secure and reliable providers available, but this guide will show you how to configure private DNS mode using Google DNS.
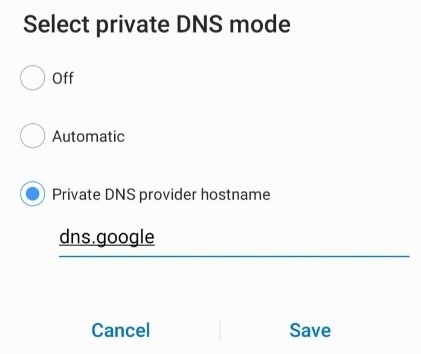
Android
- Open the Settings app.
- Tap Network & security > Advanced > Private DNS.
- Select Private DNS provider hostname.
- Type in “dns.google” as the hostname of the DNS provider, then tap Save.
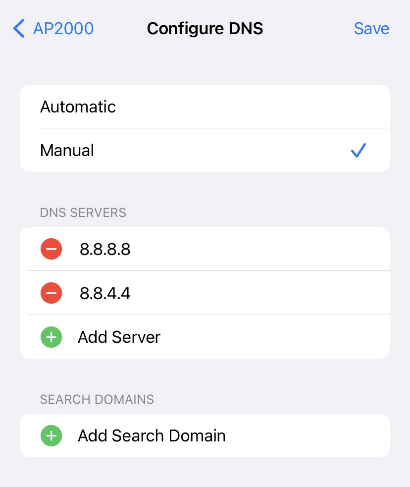
iOS
- Open the Settings app.
- Tap Wi-Fi.
- Find the Wi-Fi network that you want to change DNS servers for, then tap the ⓘ icon next to it.
- Scroll down to the DNS section, then tap Configure DNS.
- Select Manual, then enter the following Google DNS IP addresses:
- For IPv4: 8.8.8.8 and/or 8.8.4.4
- For IPv6: 2001:4860:4860::8888 and/or 2001:4860:4860::8844
Windows
- Open Control Panel.
- Click Network and Internet > Network and Sharing Center > Change adapter settings.
- Right-click on the network connection for which you want to set up private DNS mode, then click Properties.
- In the Networking tab, under This connection uses the following items, select Internet Protocol Version 4 (TCP/IPv4) or Internet Protocol Version 6 (TCP/IPv6) and then click Properties.
- Select Use the following DNS server addresses, then enter the following Google DNS IP addresses:
- For IPv4: 8.8.8.8 and/or 8.8.4.4.
- For IPv6: 2001:4860:4860::8888 and/or 2001:4860:4860::8844.
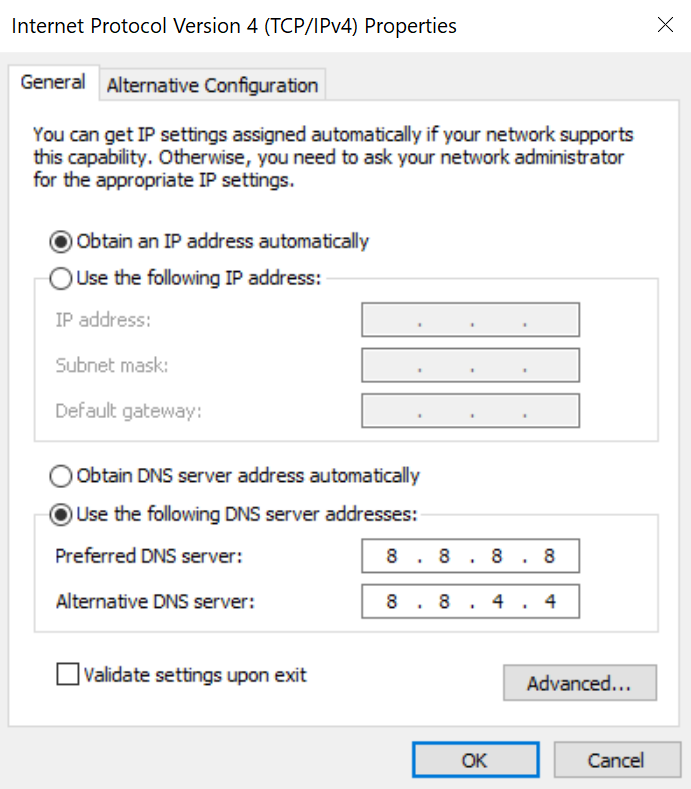
- Click OK.
- Repeat the above steps for any other network connections you want to change.
macOS
- Click the Apple menu > System Preferences > Network.
- If the lock icon in the lower left-hand corner of the window is locked, click it to make changes, then enter your password.
- Select the network connection for which you want to set up private DNS mode, then click Advanced.
- Select the DNS tab.
- Click + to replace any listed addresses with, or add, the Google DNS IP addresses at the top of the list:
- For IPv4: 8.8.8.8 and/or 8.8.4.4.
- For IPv6: 2001:4860:4860::8888 and/or 2001:4860:4860::8844.
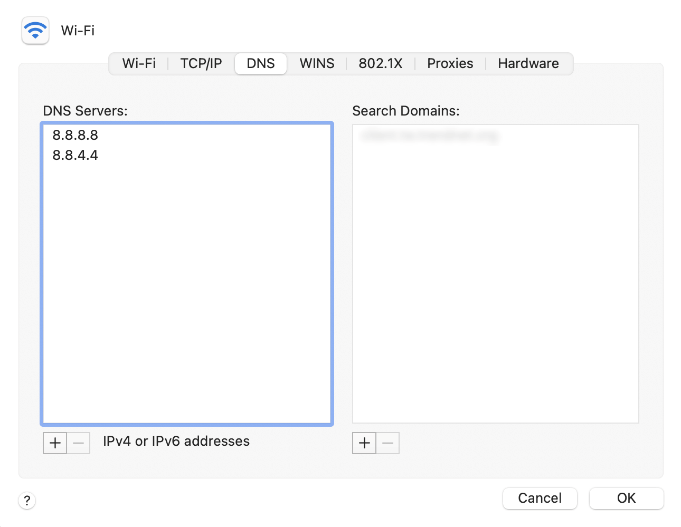
- Click OK > Apply.
- Repeat the above steps for any other network connections you want to change.
Get a VPN for Extra Privacy Online
If you’re looking to improve your online privacy, you’ll definitely want to check out Trend Micro VPN. The app — available for Android, iOS, Windows, and macOS — is lightweight, easy to use, and exactly what you need to improve your online privacy and security.
Some of Trend Micro VPN’s features include:
- Unlimited bandwidth — Uses high-end servers with no speed, traffic, or bandwidth limitations.
- Web threat prevention — Blocks malicious websites, fraud, and online scams to secure your online privacy.
- Public Wi-Fi protection — Turns an y public hotspot into a secure Wi-Fi via VPN and keeps your information safe from hackers.
Click the button below for an all-access, 7-day FREE trial.