When Microsoft announced that Windows 11 would have the ability to natively run Android apps back in October of last year, it excited many people. It was initially tested as part of Microsoft’s Windows Insider Program, but the feature is now available to all Windows 11 users.
If you’re looking to learn how to run Android apps on your Windows 11 computer, you’re in the right place!
Check System Requirements
First things first, you’ll need to make sure your computer meets the minimum system requirements, which are:
- Memory: 8GB (16GB recommended)
- Processor:
- Intel Core i3 8th Gen or above
- AMD Ryzen 3000 or above
- Qualcomm Snapdragon 8c or above
- Storage: Solid-state drive (SSD)
To check how much RAM and which processor your computer has, click Start > Settings > System > About. The information will be listed under Device specifications.

To check if your computer has an internal SSD installed — which is essential for running Android apps on Windows — press Ctrl + Alt + Del > Task Manager > Performance.
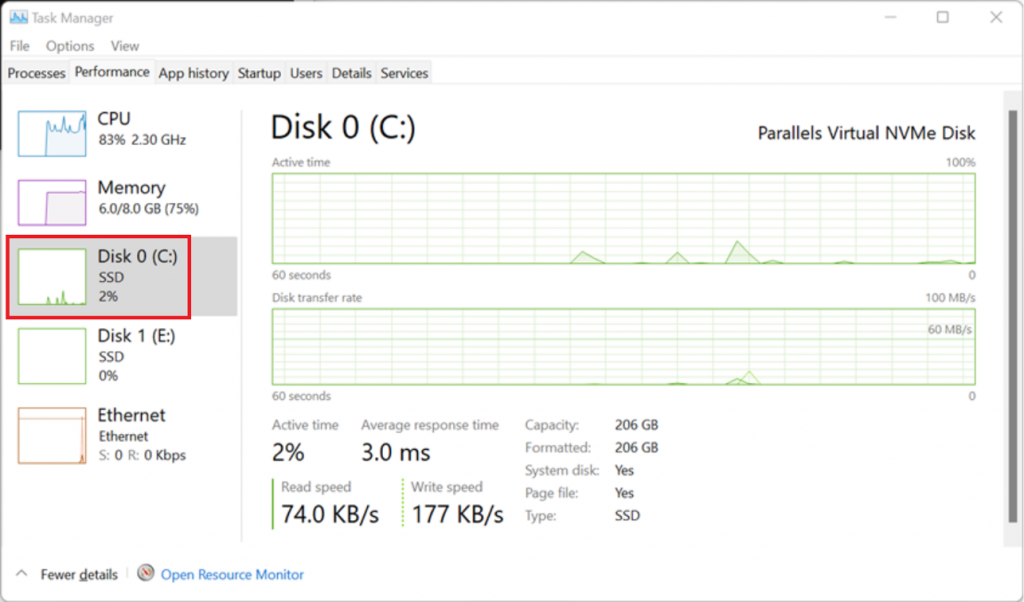
If it says HDD instead of SSD, you will unfortunately not be able to run Android apps on your computer.
Enable Virtual Machine Platform / Virtualization
Virtualization is how your computer will be able to emulate Android. If your computer came with Windows 11 preinstalled, it most likely came with virtualization enabled. However, if it isn’t enabled, you’ll have to turn it on.
To check if Virtual Machine Platform is enabled, click Start > type “Control Panel” > click Control Panel > Programs > Turn Windows features on or off.
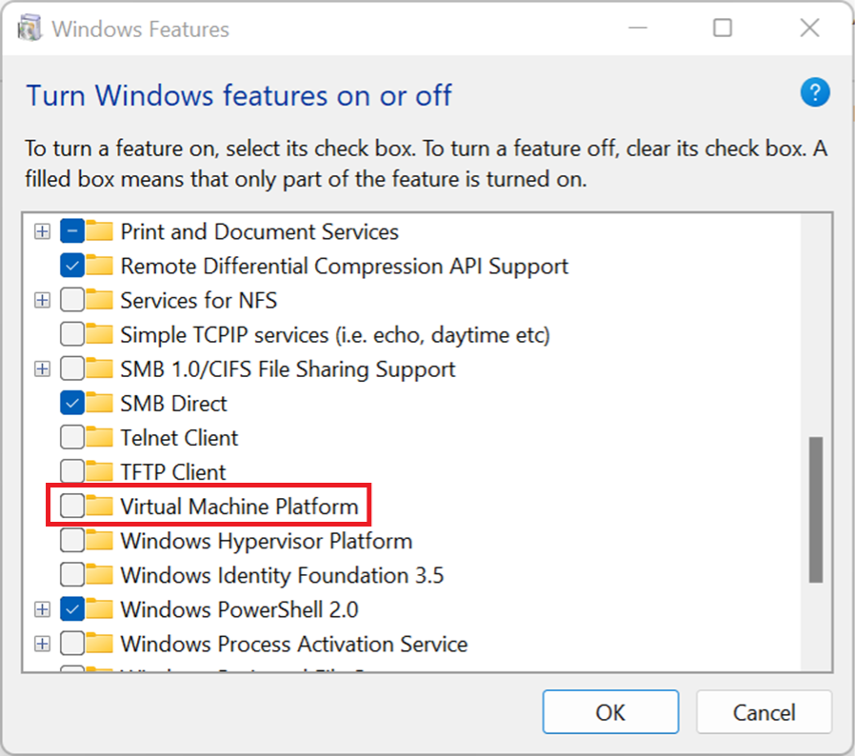
In the window that opens, scroll down to Virtual Machine Platform, check the box next to it if it isn’t already, and click OK.
If Virtual Machine Platform was not enabled, you should also follow Microsoft’s detailed guide for enabling virtualization because you may need to make some changes to your PC’s BIOS/UEFI.
Update Windows 11
Microsoft added Android app support to Windows 11 in build 22000.526. If you’re running an earlier version, you’ll need to update it. To check which version of Windows 11 you have, press the Windows key + R on your keyboard > type “WinVer” > OK.
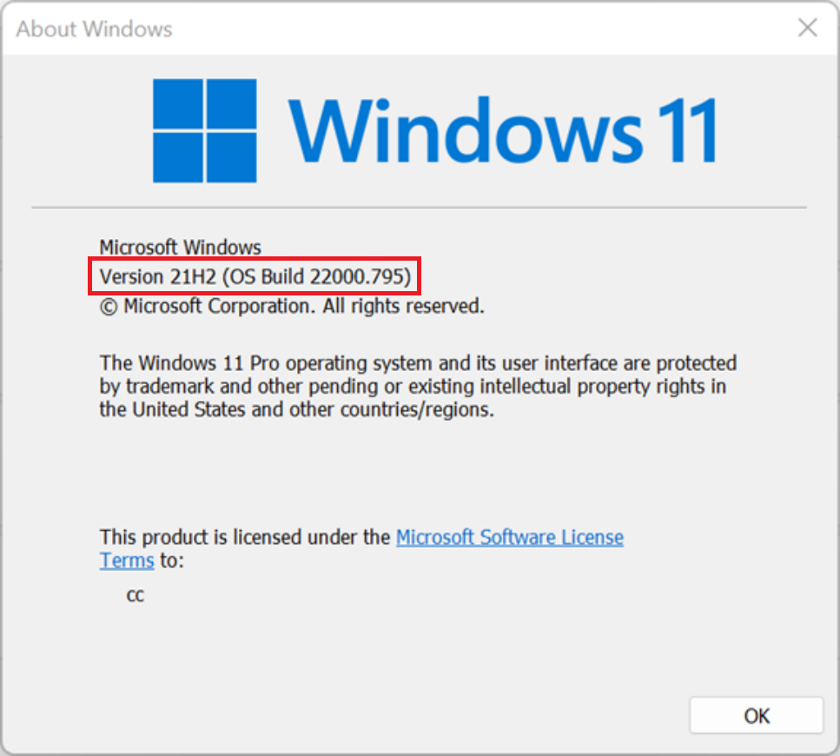
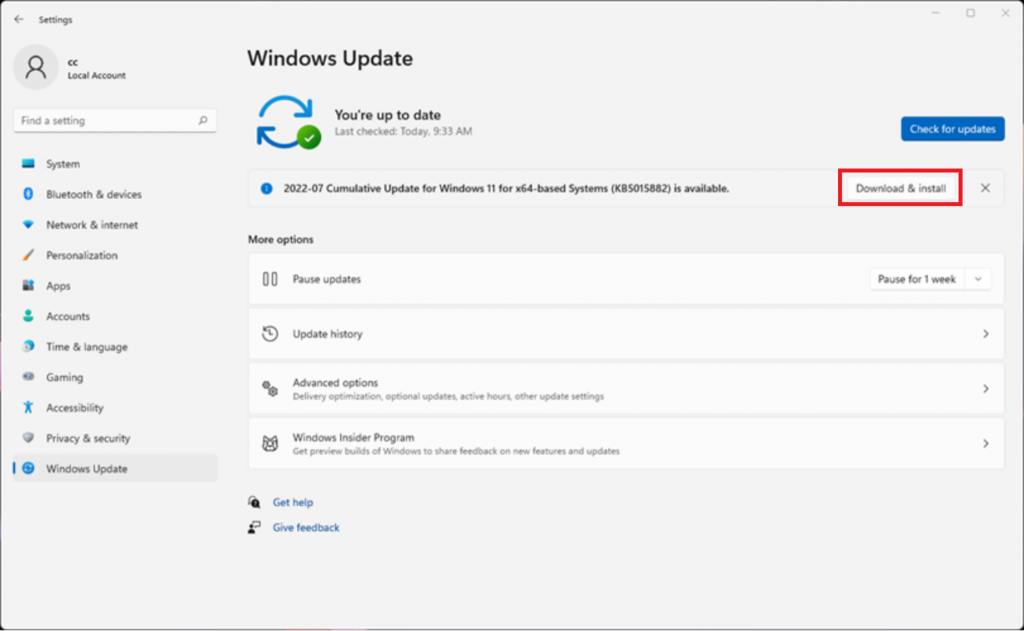
To update Windows 11, click Start > Settings > Windows Update > Check for updates. If updates are available, click Download & install.
Update the Microsoft Store App
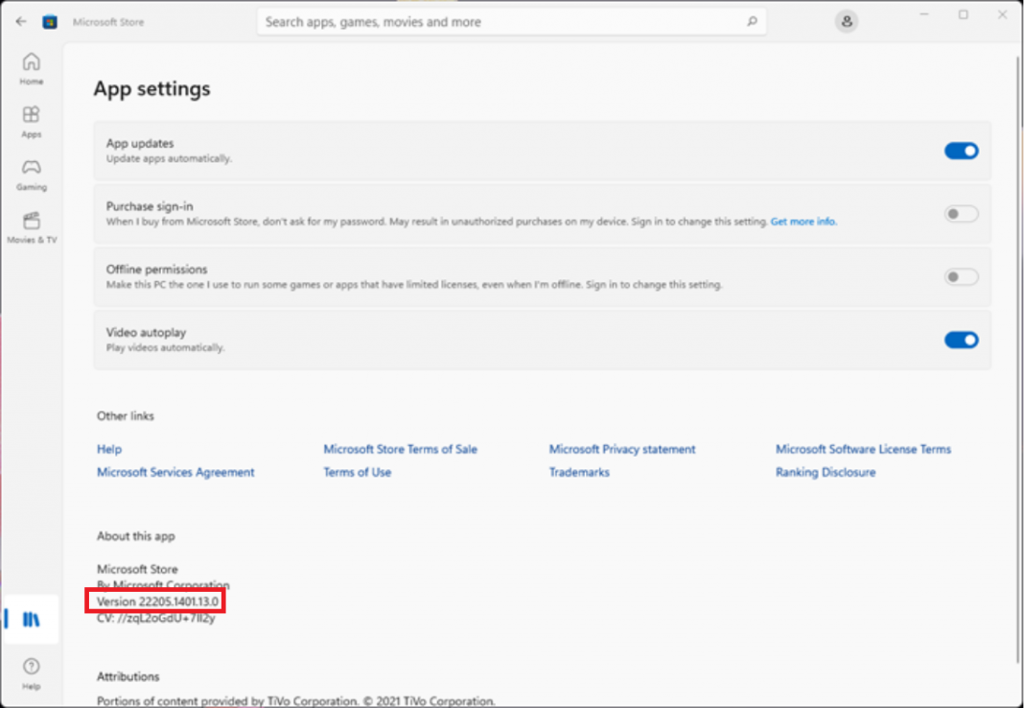
To download the necessary app from the Microsoft Store to get Android apps working on Windows 11, you’ll need to make sure it’s updated to version 22110.1402.6.0 or above. To see which version you have, open the Microsoft Store app > click the profile icon in the top-right > App settings.
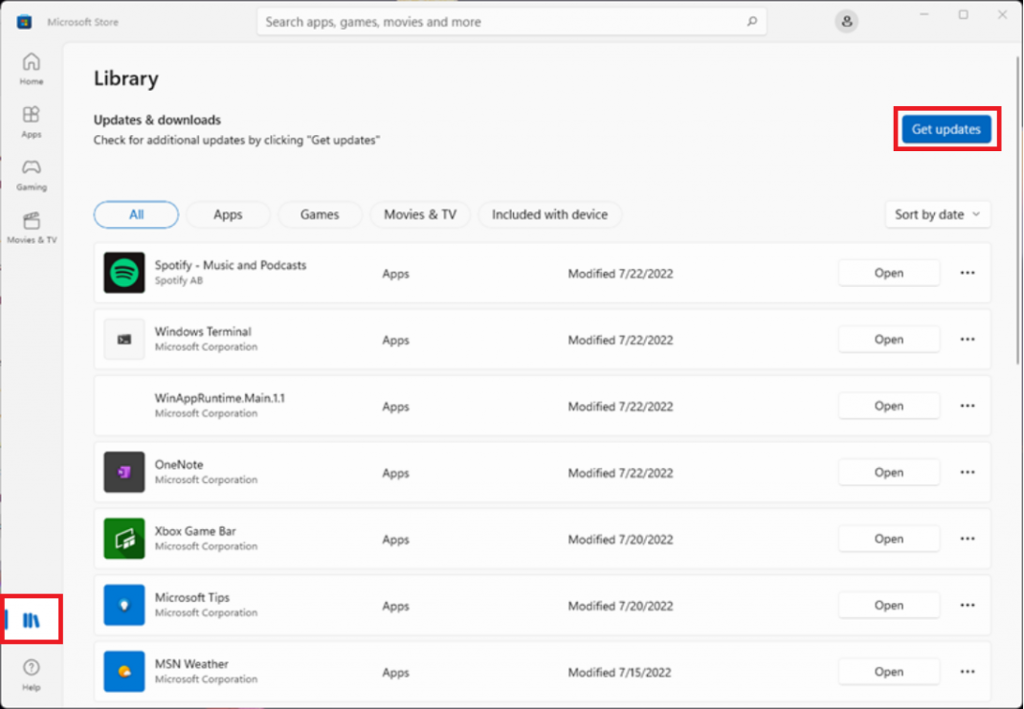
If you need to update the app, click the Library icon (the three books) in the bottom left > Get updates.
How to Install the Amazon Appstore App
To install the Amazon Appstore app, alongside Windows Subsystem for Android, which will enable your Windows 11 computer to run Android apps, open the Microsoft Store app > enter “Amazon Appstore” in the search bar > select Amazon Appstore from the search results > click Install.
Once installed, follow the on-screen setup instructions. Please note that you will need to restart your computer to complete the setup process.
How to Install Android Apps on Windows 11
Once you’ve got the Amazon Appstore app installed, installing Android apps on your Windows computer is super easy. To do so, select Start > search for “Amazon Appstore” > open the Amazon Appstore. If you already have an Amazon account, sign into it. Otherwise, you’ll need to create one.
After signing into your Amazon account, you will be able to download Android apps from the Amazon Appstore. Functionality is essentially the same as the Play Store — simply enter the name of the app you want into the search bar and select Get/Install.
After you’ve installed an app, you will be able to open it through the Amazon Appstore or the Start menu, and it will function just like the apps downloaded from the Microsoft Store.
Clear Up Disk Space with Cleaner One Pro
Haven’t got enough disk space to update Windows 11? Worried the free space on your SSD is too small to hold all the Android apps you want to download? Fear not, Cleaner One Pro is here to help — for FREE!
Cleaner One Pro is Trend Micro’s all-in-one disk cleaning app. With it, you can visualize, manage, and free up your storage space all in just one click! It’s got lots of other great features that you’re sure to love, too.
If your computer isn’t running as fast as it was when it was new, you’ll definitely want to give Cleaner One Pro a try. And why not when you can download it for free by clicking the button below?!
