Over 80% of Mac users have issues with low storage. Freeing up storage can be a tedious and complex task — that’s why we’ve put together this guide to explain the steps you can take to free up space and get the optimal performance from your Mac.
Optimize Storage
The first and best thing you should do is to optimize your Mac’s storage using its in-built tools.
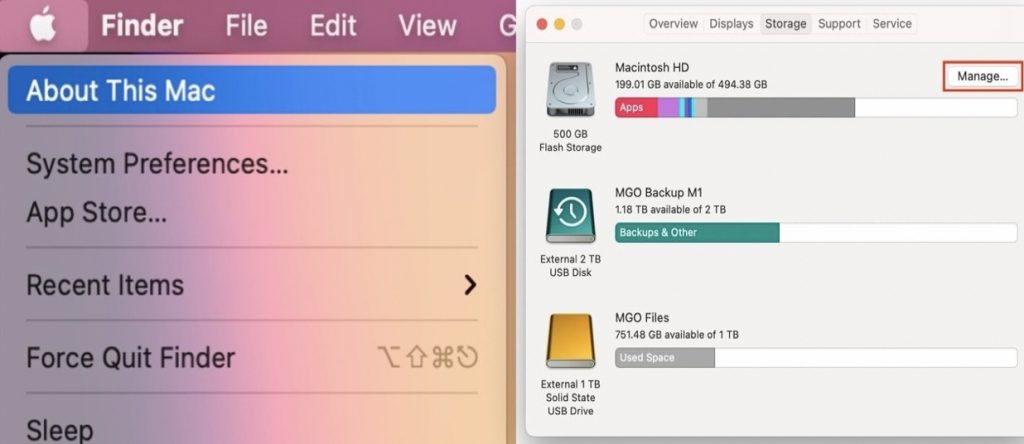
1. Click the Apple icon in the top-left corner of your Mac’s screen.
2. Click About This Mac to bring up the System information menu.
3. Click Storage.
4. Click Manage.
5. You’ll be taken to the following page.
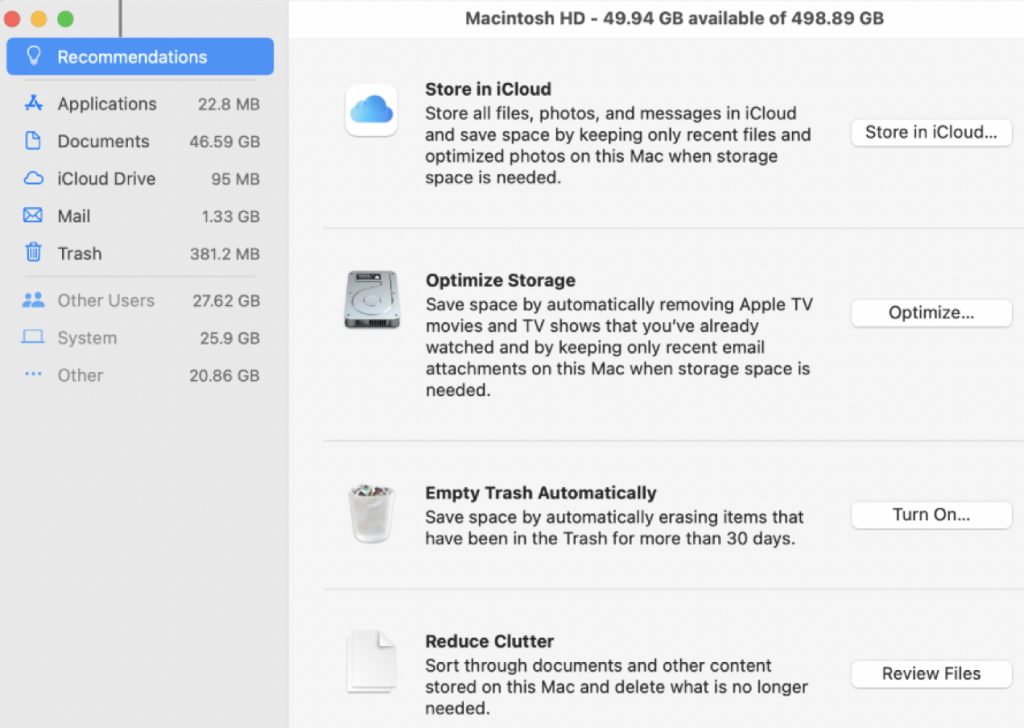
Here you can activate the four main tools which will help regulate disk space:
1. Store in iCloud: This will help save space by taking advantage of a user’s iCloud subscription to store files online — including documents, messages, and photographs (the latter will make a big difference to your storage problems).
To put it simply, this option uploads files in specific folders to iCloud, while deleting lesser-used files from your Mac’s storage. Thereafter, when you open a file that isn’t stored locally, macOS will retrieve the file from iCloud before opening it (so factor in internet connectivity).
2. Optimize Storage: This relates to video media. TV series and films you watch will be retained on Apple TV+, while being deleted locally. In addition, email attachments of a certain age will be deleted in the event of low storage space.
3. Empty Trash Automatically: Rather than sitting there indefinitely, the contents of your trash will be permanently deleted after 30 days.
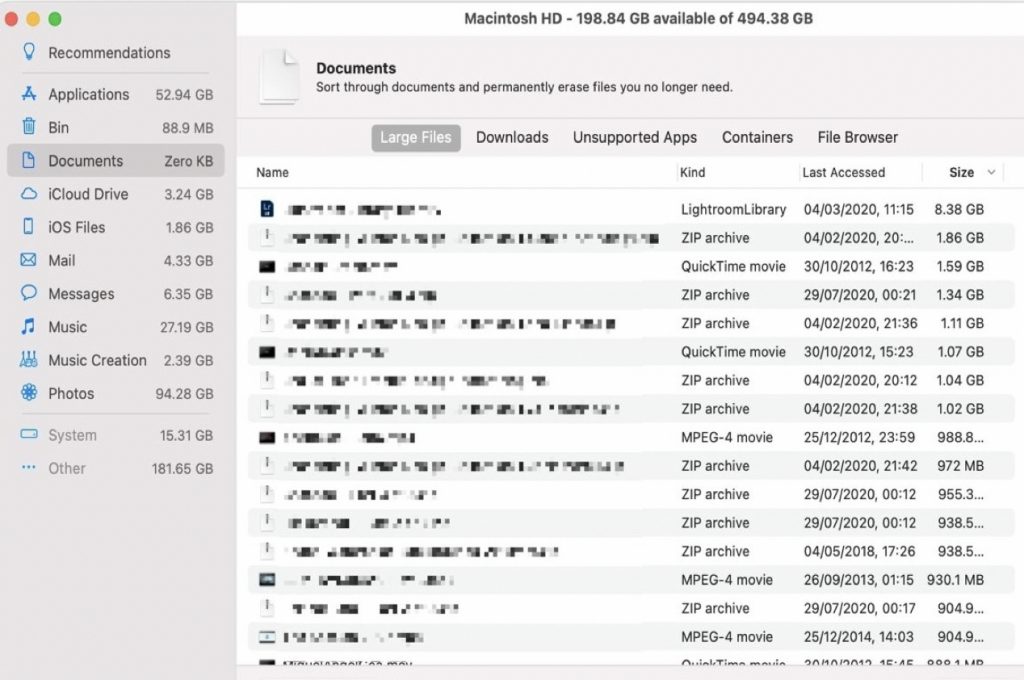
4. Reduce Clutter: Click on Review Files, and you’ll be taken to the Documents section on the far left (see below). Here you can browse all files, and look for things to delete, such as
- excessively large files you don’t need
- old downloads
- unsupported or unwanted apps
- and duplicate files — such as pictures
Need More Space?
If you’ve done above the steps and you still need more spaces. Here are more things you can do to tackle the issue.
5. Remove Language Files
Many apps come with language files — which can add up to a surprising amount of data. To remove language files:
- Go to the Applications folder.
- Right-click an app and select Show Package Contents.
- Open the Contents folder and navigate to the Resources folder.
- Go through the folder and delete all subfolders that end with “.lproj” — apart from those you need.
- Empty the Trash.
6. Temporary Files
To locate temporary files:
- Click the Go tab on Finder.
- Select Go to Folder,
- Type in “~/Library/Caches”, and click Go.
- This will lead you to a Cache folder.
- To delete files in the folder, right-click on the file and click Move to Trash.
- Empty Trash.
7. Delete Old iOS Backups
- Go to the Apple menu and select About This Mac.
- In the Storage tab, click Manage.
- In a window that opens, click iOS Files.
- Select the old backups and click Delete.
- Confirm the deletion.
8. ZIP Files
In the event of large files or folders that you want to keep, you can “zip” them to save space without having to delete them. Zipping “compresses” files so that they take up less space. When you want to access said files, double-click the ZIP file — or right-click then select Extract.
The One-Stop Solution: Trend Micro’s Cleaner One Pro
Cleaner One Pro is an easy-to-use, all-in-one disk cleaning and utility optimization app that will help you boost your Mac’s performance.
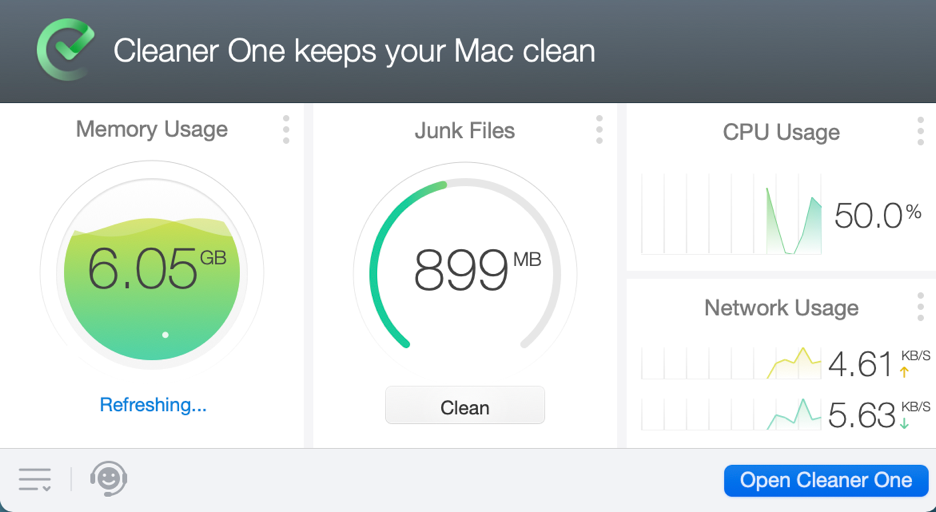
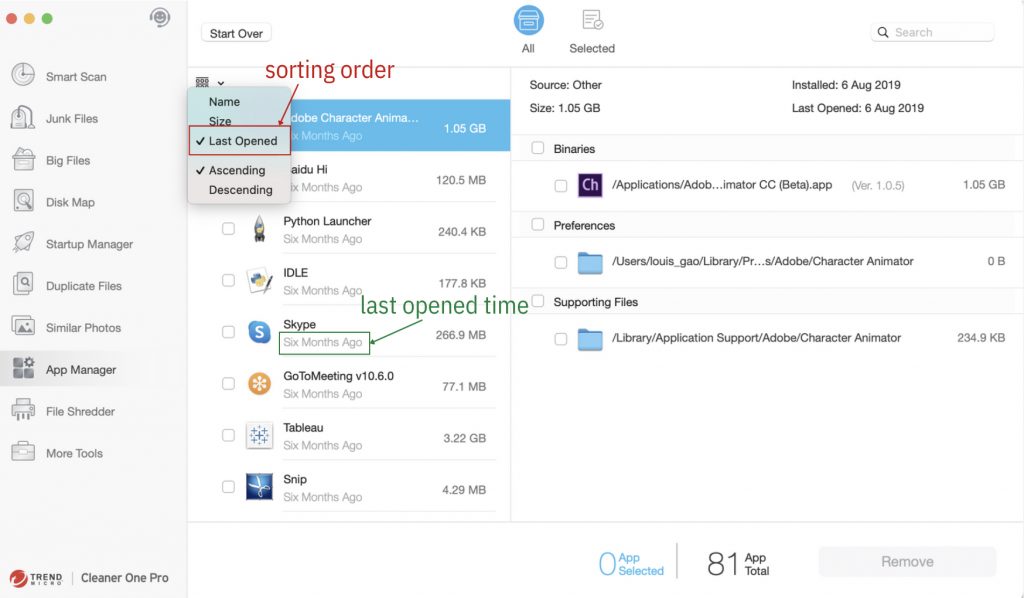
Cleaner One Pro includes several housecleaning tools, including:
- Memory Optimizer
- Junk Cleaner
- File Scanner
- Duplicate Files Finder
- App Manager
- File Shredder
- Memory Disk map
These functions are all rolled into one easy-to-use interface for maximum efficiency and simplicity. Click the link above and get more from your Mac. As always, if you’ve found this a useful and/or interesting read, please do SHARE with friends and family.
0 Comments
Other Topics
