Apple released the first public beta version of macOS 12, named Monterey, on July 1. The new macOS has many exciting features, including a new tab bar and tab groups in Safari, Focus mode, Quick Note, and better synergy between Mac and iPad. Just like you, we cannot wait to download and test macOS Monterey. This article includes three things about the new system—should you upgrade to macOS Monterey, how to upgrade to macOS Monterey, and troubleshooting and downgrade method.
Should you upgrade to macOS Monterey?
macOS Monterey will provide better work and recreation experiences through seamless synergy, simple SharePlay, and so much more. However, macOS Monterey Public Beta still has many bugs and instabilities. We highly recommend you to install it on a spare Mac only or wait for the official release.
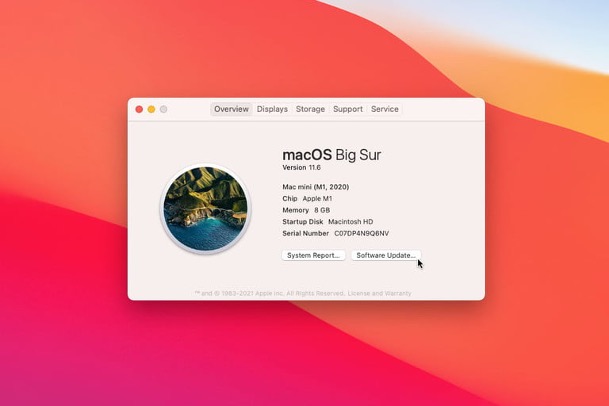
Before downloading the beta version, please go to About This Mac—Overview to see if your Mac meets the hardware requirements.

Hardware requirements:
- iMac – late 2015 and later
- iMac Pro – 2017 and later
- MacBook Air – early 2015 and later
- MacBook Pro – early 2015 and later
- Mac Pro – late 2013 and later
- Mac mini – late 2014 and later
- MacBook – early 2016 and later
New features in macOS Monterey:
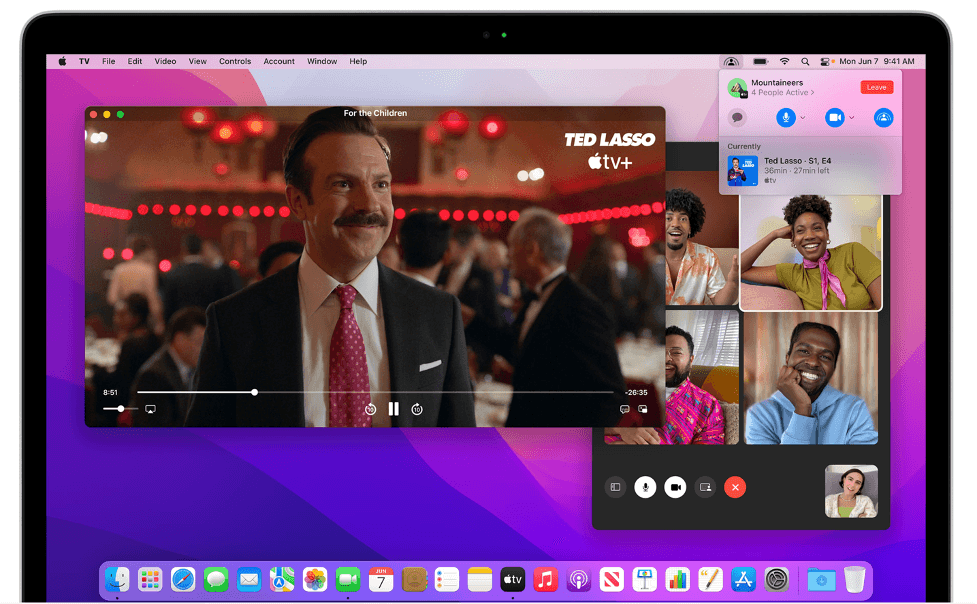
- SharePlay. With SharePlay, you can watch together, listen together, and share your screen right inside FaceTime.
- Streamlined tab bar and tab groups. Redesigned tabs float on top of the page and change the color with the site. You can create your own tab groups and access them on iPhone and iPad.

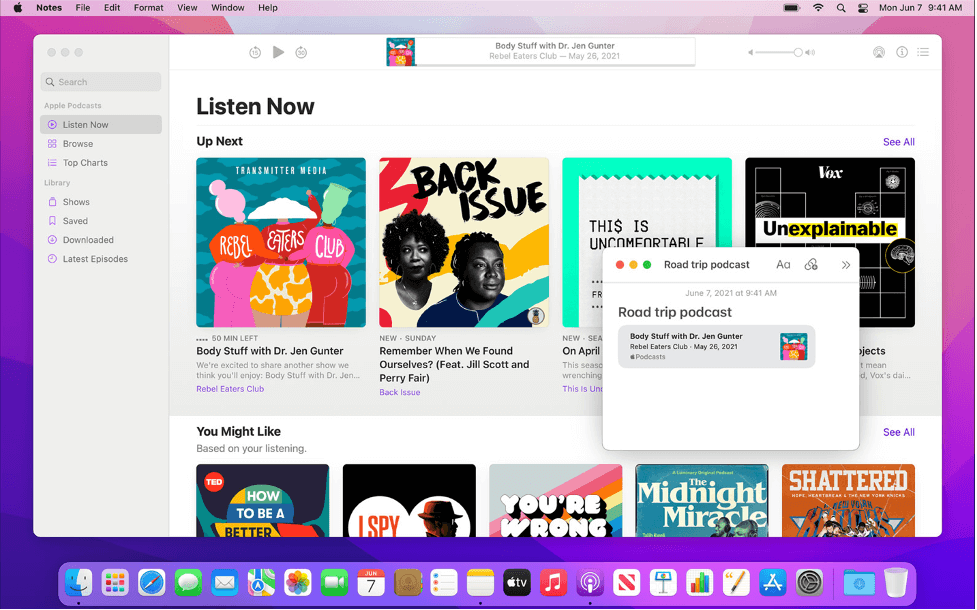
- Quick Note. You can call up Quick Note using a keyboard shortcut, hot corner, or action center.
- Universal Control. Better synergy between iPad and Mac just needs a single keyboard, mouse or trackpad.

- Airplay to Mac. Now you no longer need data cable or third-party software to realize airplay.

How to Upgrade to macOS Monterey
There are two options for upgrading to macOS Monterey. Follow the below steps according to preference.
#1 About This Mac
- Click the Apple icon in the top-left of your screen.
- Click About This Mac.
- Go to the Overview tab.
- Click Software Update and proceed.
#2 System Preferences
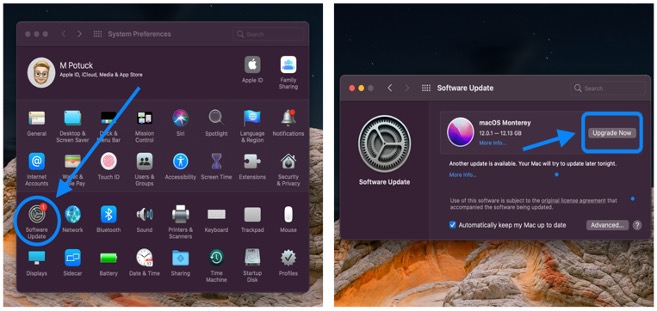
- Open System Preferences.
- Click Software Update.
- macOS Monterey will appear.
- Click Upgrade Now.
Downgrade method and upgrade troubleshooting
You may encounter one of two primary problems when attempting to upgrade macOS Monterey. Please see below for troubleshooting options.
#1 You Cannot Install macOS Monterey on Your Mac:
Solution:
- Check your disk space to ensure you have enough room. How much space you need will depend on what system you’re upgrading from — but the requirement can be as high as 35.5GB for older systems.
- Use Cleaner One Pro to clean and optimize your Mac’s storage.
- If you still cannot install, follow these further steps to start-up in Safe Mode:
- Restart Mac and immediately hold the Shift key.
- Reinstall macOS Monterey in Safe Mode.
- Restart Mac again in normal mode..
#2: Mac Does Not Turn On After Installing macOS Monterey:
Solution:
- Check Mac hard drive with Disk Utility in macOS Recovery.
- Restart Mac and immediately hold the Command and R keys to enter macOS Recovery mode.
- Release the keys when you see the loading bar.
- Select Disk Utility from the macOS Utilities menu.
- Select Startup Disk or the macOS Volume in the left sidebar of Disk Utility.
- Click First Aid at the top center and click Run to repair this disk.
- When it is finished, click Done and restart your Mac as usual.
Plus, if you want to downgrade to Big Sur, please refer to the following method:
- Connect your Time Machine backup disk where you have backed up all the files before upgrading.
- Restart your Mac. Press and hold Command (⌘)-R to enter macOS Recovery. You can release the keys when you see the Apple logo or the spinning globe.
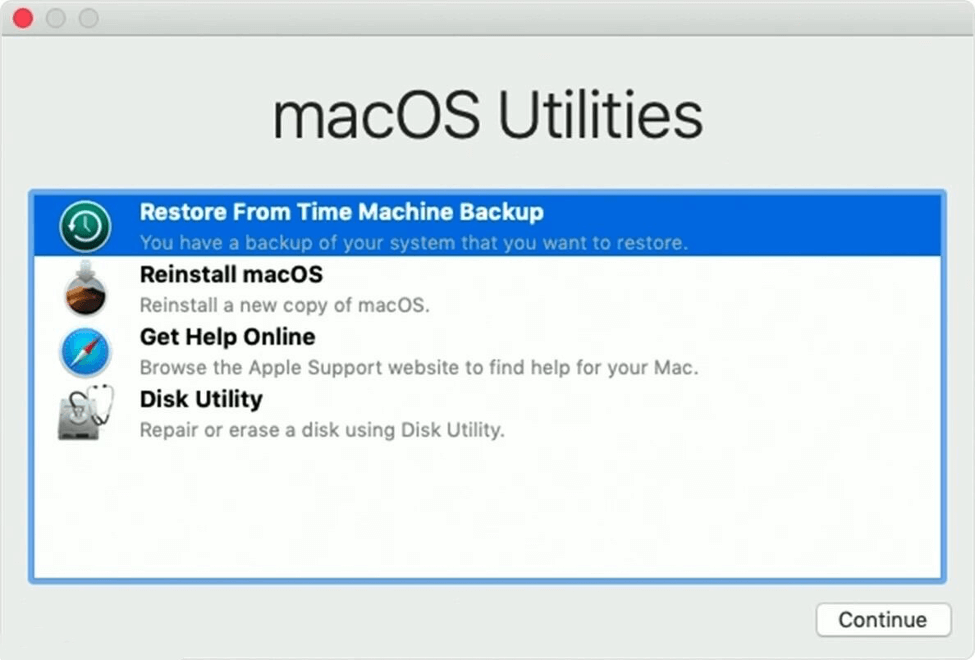
When the “macOS Utilities” window appears, select “Restore from Time Machine Backup” and click Continue.
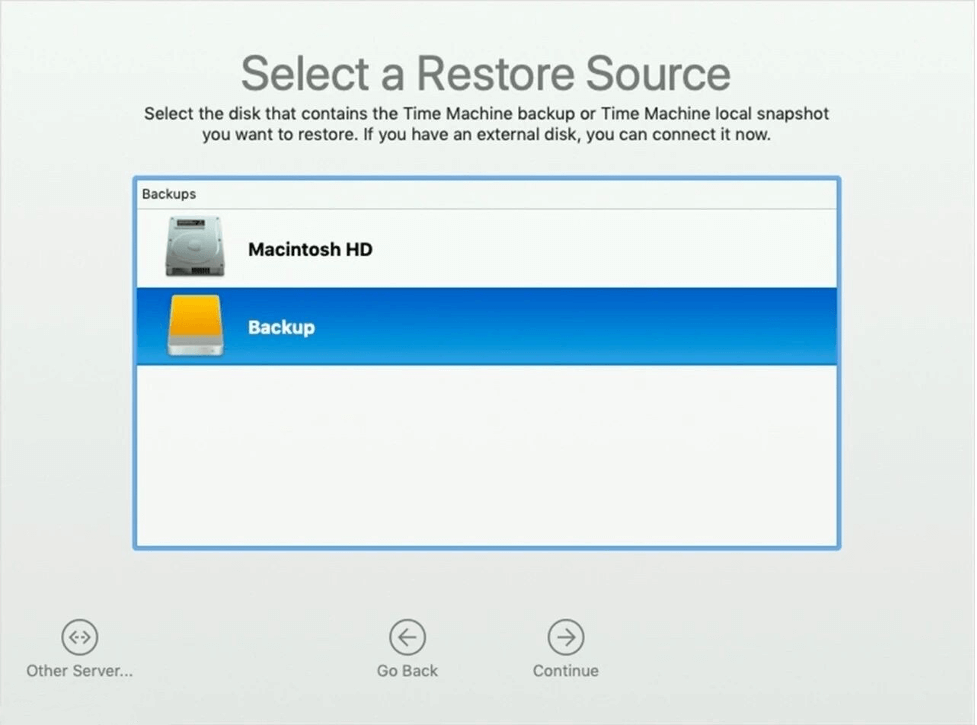
- When the “Select a Restore Source” window appears, choose your Time Machine backup disk and click continue.
- Select the backup file version and click Continue. Then select the destination disk and click Restore.
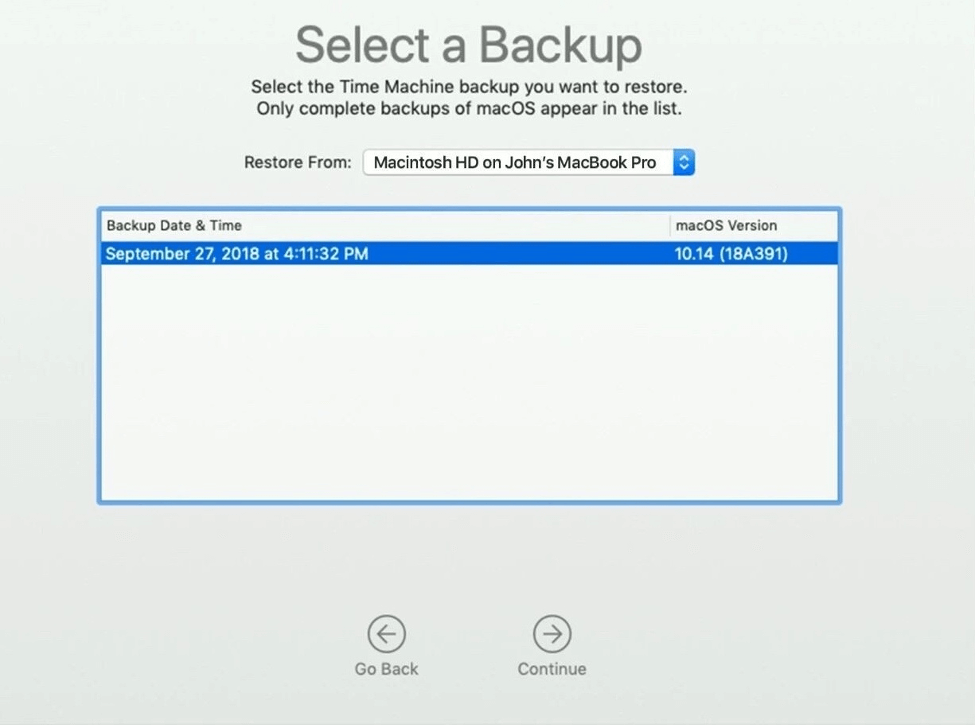
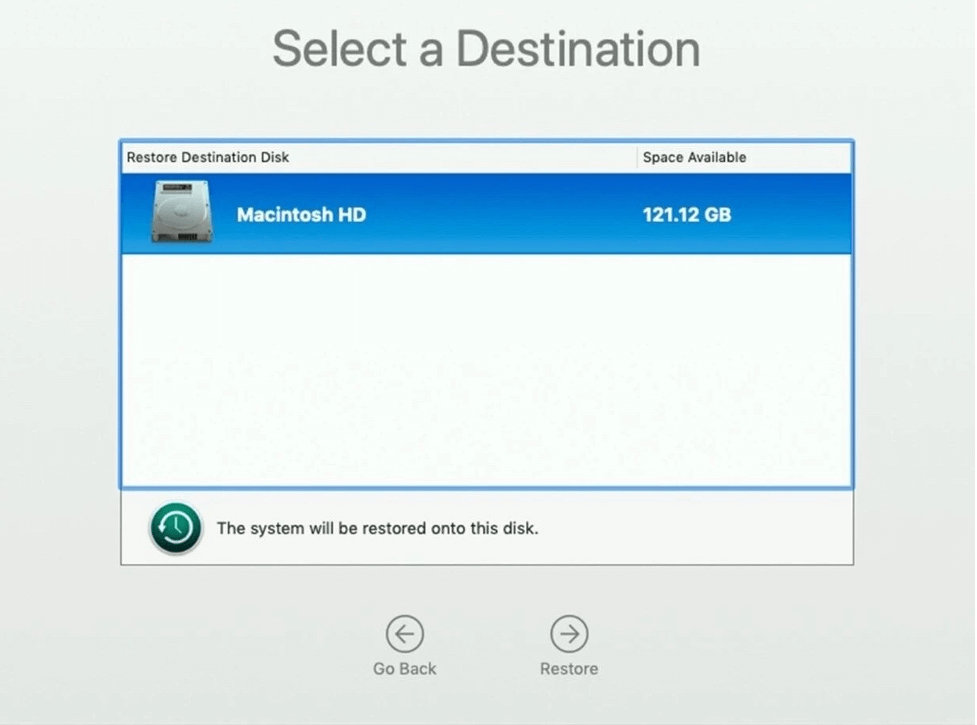
- The restore process begins to restore your Mac to Big Sur.
If you’re still having trouble upgrading, follow this link to read more about macOS Monterey troubleshooting. And, as ever, if you’ve found this article a useful and/or interesting read, please do SHARE with family and friends.